LangGraph 是什么?用一句话说清楚
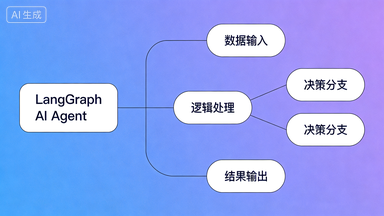
如果你用过 Dify 或 Coze,你知道那是「拖拽式」搭 Agent。LangGraph 是它们的「底层引擎」——用代码来定义 Agent 的决策流程,像画流程图一样,把 AI 的每一步思考都变成可控的节点。
类比:
Dify 是自动挡汽车,LangGraph 是手动挡——更麻烦,但你能精确控制每一个齿轮。
Dify 是自动挡汽车,LangGraph 是手动挡——更麻烦,但你能精确控制每一个齿轮。
它由 LangChain 团队开发,目前 GitHub Star 超过 12,000,Klarna、Replit 等公司都在生产环境使用。想了解 Agent 的底层架构原理,可以先看 AI Agent 四大核心模块。
准备工作
1
安装 LangGraph
打开终端,运行:
pip install langgraph langchain-openai> 此时你应该看到:Successfully installed langgraph-x.x.x
如果提示 pip 版本过低,先运行
pip install --upgrade pip2
准备 API Key
OpenAI(推荐新手):去 platform.openai.com 注册,新用户有免费额度。
Anthropic Claude:去 console.anthropic.com 注册,同样有免费额度。
拿到 Key 后,在终端设置环境变量:
# Windows
set OPENAI_API_KEY=sk-你的key

# Mac/Linux
export OPENAI_API_KEY=sk-你的key
4
写第一个 LangGraph 程序
新建文件 my_agent.py,复制以下代码:
from langgraph.graph import StateGraph, END
from langchain_openai import ChatOpenAI
from typing import TypedDict, List

# 1. 定义状态(记忆本的格式)
class AgentState(TypedDict):
    messages: List[str]

# 2. 定义节点(AI 思考这一步)
llm = ChatOpenAI(model="gpt-4o-mini")

def ai_node(state: AgentState):
    response = llm.invoke(state["messages"])
    return {"messages": state["messages"] + [response.content]}

# 3. 搭建图
graph = StateGraph(AgentState)
graph.add_node("ai", ai_node)
graph.set_entry_point("ai")
graph.add_edge("ai", END)

# 4. 编译并运行
app = graph.compile()
result = app.invoke({"messages": ["你好,介绍一下你自己"]})
print(result["messages"][-1])
python my_agent.py> 此时你应该看到:AI 的回复文字打印在终端里。
常见报错:
AuthenticationError → 检查 API Key 是否正确设置,注意不要有多余空格。5
加上「记忆」——让 Agent 记住上下文
上面的版本每次都是全新对话。加两行代码,让它记住历史:
from langgraph.checkpoint.memory import MemorySaver

memory = MemorySaver()
app = graph.compile(checkpointer=memory)

config = {"configurable": {"thread_id": "user_001"}}

result1 = app.invoke({"messages": ["我叫小明"]}, config=config)
result2 = app.invoke({"messages": ["我叫什么名字?"]}, config=config)
print(result2["messages"][-1])  # 它会记得你叫小明
> 此时你应该看到:AI 回复「你叫小明」,说明记忆生效了。
thread_id 就是会话 ID,不同用户用不同 ID,互不干扰。6
加上「工具」——让 Agent 能搜索网络
这是 LangGraph 最强大的地方:让 AI 在需要时自动调用外部工具。
from langchain_community.tools import DuckDuckGoSearchRun
from langgraph.prebuilt import create_react_agent

search = DuckDuckGoSearchRun()  # 免费搜索工具,不需要 API Key
tools = [search]

app = create_react_agent(llm, tools, checkpointer=MemorySaver())

config = {"configurable": {"thread_id": "search_demo"}}
result = app.invoke(
    {"messages": ["今天 AI 领域有什么新闻?"]},
    config=config
)
print(result["messages"][-1].content)
> 此时你应该看到:AI 自动搜索了网络,返回今天的 AI 新闻摘要。
这就是 ReAct 模式:
AI 先「思考」要不要用工具,再「行动」调用工具,再「观察」结果,循环直到给出答案。想深入了解可以看 Agent 生产架构深度解析。
AI 先「思考」要不要用工具,再「行动」调用工具,再「观察」结果,循环直到给出答案。想深入了解可以看 Agent 生产架构深度解析。
效果验证
完成以上 6 步后,你的 Agent 应该能做到:
- ✅ 接收用户输入并用 AI 回复
- ✅ 记住同一会话的历史对话
- ✅ 在需要时自动搜索网络获取最新信息
- ✅ 多用户隔离(不同 thread_id 互不干扰)
常见问题 FAQ
LangGraph 和 LangChain 什么关系?
LangGraph 是 LangChain 团队开发的独立库,专门用于构建有状态的 Agent 工作流。可以单独使用,不依赖 LangChain。
免费吗?
LangGraph 本身完全免费开源。费用只来自你调用的大模型 API,用 gpt-4o-mini 的话非常便宜,测试阶段几乎感觉不到费用。
和 Dify、Coze 比有什么优势?
灵活性更高,可以实现 Dify/Coze 做不到的复杂逻辑(比如动态分支、并行节点、自定义状态机)。代价是需要写代码。
Windows 上运行报错怎么办?
确认 Python 版本 ≥ 3.9,建议用
python --version 检查。如果有编码问题,在文件开头加 # -*- coding: utf-8 -*-。